Troy Basso Outdoors
"Capturing the outdoor lifestyle"
“Orvis Carry It All” Fly Rod Case Review: The Ultimate Travel Companion”
When it comes to fly fishing, having the right equipment is crucial for a successful day on the water. The Orvis Carry It All Fly Rod Case is a game-changer for fly anglers who demand a durable and convenient solution for transporting their rods and reels. In this review we’ll dive deep into the features and advantages of the Orvis Carry It All Fly Rod Case to help you make an informed decision for your fly fishing adventures.

Orvis Carry It All Fly Rod Case: A Fly Fisher’s Dream
Key Features:
- Rugged Construction: Crafted from high-quality, heavy-duty materials, the Orvis Carry It All Fly Rod Case is designed to endure the rigors of travel and protect your valuable fly fishing gear.
- Versatile Design: This fly rod case accommodates multiple fly rods and reels of varying sizes, offering the flexibility you need for different fishing situations.
- Ample Storage Space: With multiple pockets, sleeves, and compartments, there’s room for everything you need, including fly boxes, lines, and accessories.
- Padded Protection: Your precious fly rods and reels are well-protected with the case’s padded interior, safeguarding them from any potential bumps or shocks during transit.
- Easy Transportation: The case features both a durable handle and a comfortable, adjustable shoulder strap, ensuring convenience and ease of transportation, whether you’re walking to your favorite fishing spot or traveling long distances.
Benefits of the Orvis Carry It All Fly Rod Case:
- Unmatched Durability: The robust construction ensures your fly fishing equipment remains safe and secure during travel, preventing damage and costly repairs.
- All-In-One Convenience: With its generous storage capacity and multiple compartments, this case allows you to organize and carry all your essential fly fishing gear in one, easy-to-carry package.
- Versatility: The case can handle a variety of fly rods and reels, making it the perfect solution for both single-day outings and extended fishing trips.
- Peace of Mind: The padded protection and secure closures provide peace of mind, knowing your cherished fly fishing gear is shielded from the elements and potential mishaps.
- Travel-Ready: Designed for travel, this fly rod case is the ideal companion for fly anglers who want to explore new fishing destinations with the convenience of a well-organized and sturdy case.
The Orvis Carry It All Fly Rod Case is a reliable, versatile, and durable solution for fly anglers of all levels. Whether you’re heading to your local fishing spot or embarking on a fly fishing adventure, this case offers the perfect combination of protection, convenience, and ample storage space. Designed to withstand the challenges of travel and the great outdoors, it’s a valuable investment for any fly fisher.
If you’re in search of a dependable fly rod case that simplifies transportation and keeps your gear safe, the Orvis Carry It All Fly Rod Case is the ultimate choice. Elevate your fly fishing experiences with this exceptional piece of equipment, and ensure that every moment on the water is a memorable one.
One note is that the rod storage area is large enough to hold 3 rods in the tubes, This is a huge plus for the traveling angler.
For more information and to purchase your Orvis Carry It All Fly Rod Case, visit Orvis’s official website. Get ready to pack your gear and explore new fly fishing destinations with confidence!
Review: Badlands Venture Jacket

I am always looking for the Perfect Midseason jacket, most are too warm for midday sits, come are too light for chilly mornings. A good mid-season jacket must have balance and be comfortable on a chilly morning yet not make you sweat in a late afternoon hunt. The Badlands Venture Jacket has filled that void in my hunting gear.
Its warmth comes from the Primaloft® 80-grain hi loft insulation thought-out the body and its comfort comes from the reduced amount of 40-grains in the sleeves. I truly believe that is a major part of why this is a prefect jacket for both chilly mornings and not so chilly afternoon walks into the stand.
Other things that make the jacket a superior are:
- Built in rangefinder pocket
- Extremely waterproof
- Brimmed & adjustable hood
- Very breathable
- Zippered Armpit vents
- The outer shell fabric is dead quiet when moving through brush
If you’re looking for a new midseason jacket give the Badlands Venture a try. You wont be disappointed,
The CZ Bobwhite: Quality at a budget friendly price point.

The CZ Bobwhite shotgun is a true classic in the world of double-barrel shotguns, boasting a rich heritage and a reputation for quality and reliability. In this comprehensive review, we’ll dive deep into the features and performance of this timeless firearm, helping you make an informed decision about your next shotgun purchase.
Design and Build Quality The CZ Bobwhite impresses from the moment you pick it up. Crafted with precision and attention to detail, the shotgun features a solid steel receiver and well-finished Turkish walnut stock. The wood-to-metal fit is superb, and the checkering on the stock and forearm enhances your grip and control. The finish is both elegant and rugged, making the CZ Bobwhite a shotgun that’s as at home in the field as it is on the range.
Performance and Versatility One of the standout features of the CZ Bobwhite is its versatility. Available in 12 or 20-gauge, with barrel lengths of 26 or 28 inches, it can handle a wide range of shooting applications, from upland game hunting to sporting clays and skeet shooting. The double-trigger design offers quick and reliable shot selection, allowing you to adapt to changing shooting conditions on the fly. Whether you prefer the classic fixed chokes or the modern screw-in choke tubes, the CZ Bobwhite has you covered.
Reliability and Durability CZ has a long history of producing robust and dependable firearms, and the Bobwhite is no exception. This shotgun can withstand years of heavy use and still perform flawlessly. Its break-action design ensures simple and straightforward operation, and the manual safety is well-placed for easy access. With proper maintenance, the CZ Bobwhite can be passed down through generations, maintaining its performance and charm.
Price and Value The CZ Bobwhite offers exceptional value for its price point. It competes favorably with more expensive shotguns, delivering a high level of quality and performance at a more budget-friendly cost. Whether you’re an experienced shooter looking for a reliable backup gun or a newcomer to the world of shotguns, the CZ Bobwhite is a great choice that won’t break the bank.
In summary, the CZ Bobwhite shotgun is a true testament to the timeless appeal of double-barrel shotguns. Its classic design, reliable performance, and reasonable price make it a top contender in the market. Whether you’re a seasoned shooter or just starting your shotgun journey, the CZ Bobwhite is a shotgun that combines elegance with practicality, and it’s bound to stand the test of time.
When it comes to quality shotguns, the CZ Bobwhite should be on your shortlist. Discover the beauty and functionality of this classic firearm, and elevate your shooting experience to new heights. The CZ Bobwhite is the embodiment of “old-world craftsmanship meets modern-day performance.”
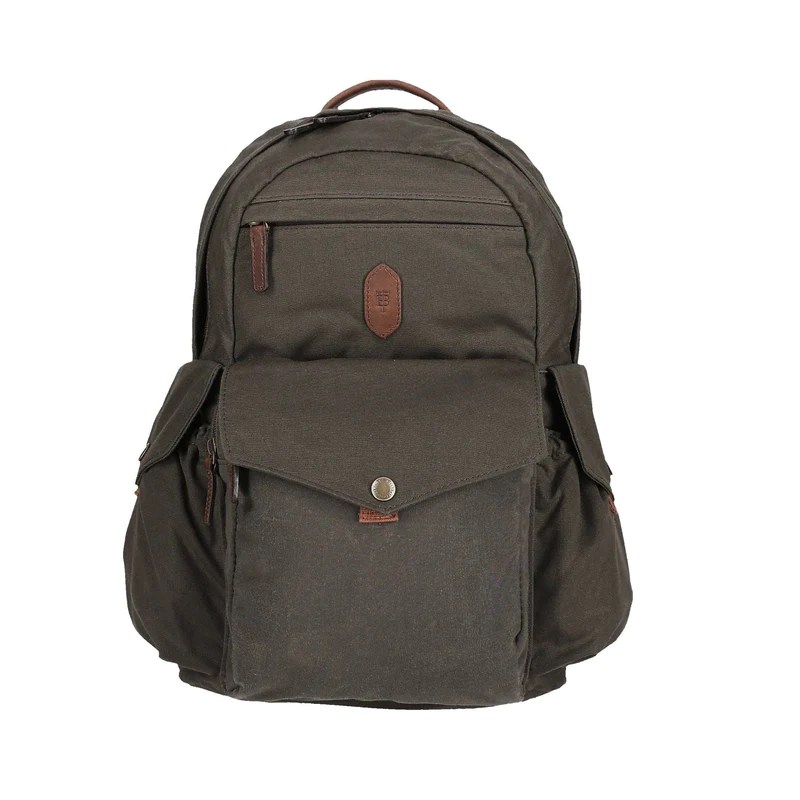
Tom Beckbe canvas backpack
In the world of outdoor gear and everyday carry, the Tom Beckbe Canvas Backpack is making waves for its unique blend of durability and style. This review dives into the features and benefits of the Tom Beckbe Canvas Backpack, helping you make an informed decision for your next adventure or daily commute.
Tom Beckbe Canvas Backpack: A Rugged and Stylish Companion
Key Features:
- Premium Canvas Construction: The Tom Beckbe Canvas Backpack is crafted from high-quality, rugged canvas that can withstand the toughest outdoor conditions. Its durability ensures it’s ready for both urban and wilderness settings.
- Generous Storage Capacity: With ample storage space, this backpack can easily accommodate all your essentials, whether you’re hiking, commuting, or traveling.
- Organizational Efficiency: The backpack features multiple pockets, including a dedicated laptop sleeve, internal and external zippered pockets, and side pockets for water bottles, making it easy to keep your gear organized and accessible.
- Comfortable to Carry: Padded shoulder straps, a cushioned back panel, and an adjustable chest strap provide superior comfort, making it ideal for long treks or daily commutes.
- Classic Aesthetics: Tom Beckbe’s signature style shines through in this canvas backpack, offering a timeless and versatile design suitable for various settings.
Benefits of the Tom Beckbe Canvas Backpack:
- Exceptional Durability: The premium canvas material and reinforced stitching make this backpack exceptionally rugged, ensuring it stands up to years of use.
- Ample Storage Options: From work supplies to outdoor gear, this backpack offers plenty of room, allowing you to carry everything you need, wherever you go.
- Effortless Organization: The well-designed pockets and compartments keep your items neat and accessible, preventing the hassle of digging through your bag.
- All-Day Comfort: The padded straps and cushioned back panel reduce fatigue, making it comfortable to wear for extended periods, whether you’re exploring the outdoors or navigating the city.
- Timeless Style: The classic design and premium materials ensure that the Tom Beckbe Canvas Backpack not only meets your functional needs but also complements your personal style.
Conclusion:
The Tom Beckbe Canvas Backpack is a testament to the perfect blend of durability and style, making it an excellent choice for adventurers and city dwellers alike. Crafted with premium materials, it offers ample storage, exceptional comfort, and timeless aesthetics. Whether you’re headed to the office or the great outdoors, this backpack ensures you’re well-prepared and looking great.
For those seeking a versatile backpack that can handle the rigors of outdoor excursions and the demands of urban life, the Tom Beckbe Canvas Backpack is an outstanding option. Elevate your everyday carry and adventures with this exceptional piece of gear and make every journey a memorable one.
For more information and to purchase your Tom Beckbe Canvas Backpack, visit Tom Beckbe’s official website. Get ready to experience the perfect combination of durability and style today!
Patagonia Men’s Down Sweater Hoody

The Patagonia Men’s Down Sweater Hoody stands out as an exceptional piece of outdoor gear, marrying style with functionality. Its lightweight construction and ethically sourced 800-fill-power down insulation make it a reliable companion for chilly adventures. The hoody’s compressibility is a game-changer, easily fitting into its own chest pocket for convenient packing.
The jacket’s slim fit and contoured hood provide a snug yet unrestrictive feel, perfect for layering or wearing on its own. The durable water-repellent (DWR) finish ensures protection against unexpected drizzles, enhancing its versatility for various weather conditions.
Crafted with Patagonia’s commitment to sustainability, the Down Sweater Hoody reflects the brand’s dedication to minimizing environmental impact. The recycled polyester shell reinforces its eco-friendly design without compromising on durability.
Whether you’re trekking through mountain trails or navigating urban landscapes, this hoody effortlessly transitions from performance wear to a stylish everyday layer. With its timeless design, thoughtful features, and eco-conscious construction, the Patagonia Men’s Down Sweater Hoody stands as a reliable and responsible choice for those who value both performance and sustainability.
